Building a Panel Pipeline
Published May 14, 2021

Pamela Wadhwa
Over a number of recent posts, we have given some examples of how to build dashboards using Panel and how to integrate widgets from Panel and ipywidgets into the same Panel app. These have all been one-stage examples, but you can actually use Panel to build a pipeline of stages with information carried over from one stage to the next. You can think of these stages as different pages on a website.
In this post, we present an example of a simple pipeline using Panel to illustrate how easy it is to put in place.
Instantiating the Pipeline
We start by importing Panel, then instantiating a Panel Pipeline object called
pipeline. In this instance, we include the inherit_params parameter, setting
it to False. If inherit_params is True, then parameters declared on
consecutive stages are inherited. It will not matter in our simple example, but
enabling inherited parameters across pipeline stages may be useful in some
application contexts.
Building Stages
Next, we can add stages to the pipeline. To do so, we need to build the additional stages explicitly.
To construct a Panel pipeline, we need to create parameterized classes (i.e.,
classes that inherit from the param.Parameterized class from the
Param library). Param enables declarative programming in Python;
that is, we can simply state facts about our parameters and then use them
throughout our code. Within Panel apps, the panel.depends decorator function
links parameter values to callback functions to update the state of the Panel
app. In Panel pipelines, the param.output decorator function links computed
values between successive stages. The parameters received at a given stage in a
pipeline must be declared consistently to consume output from the previous
stage.
In addition, we need a panel method in each stage of the pipeline to
determine the layout of panes and widgets in the Panel app.
The class Stage1 defined below displays a text input widget and a continue
button. The text entered into Stage1 is passed on to the next stage
(Stage2). To do this, we define a string parameter text and an output
method with the param.output('text') decorator. This indicates that text is
the output of this stage.
Notice also that we include a boolean parameter ready to flag when the stage
is complete and ready to proceed to the next stage. We will see how this is used
later.
The __init__ function instantiates each of the widgets we wish to use in the
stage. Within the function, we instantiate a TextInput widget and a
continue_button. The click of the continue_button is connected to a callback
method on_click_continue defined within this class. Finally, the (variadic)
keyword arguments **params are passed in as an input to enable passing keyword
arguments between stages. The second stage will also need **params as an input
to its __init__ function to propagate those keyword arguments onward.
The on_click_continue function simply sets our ready attribute to True,
which triggers the pipeline to move to the next stage.
Finally, the panel method is necessary to display this stage in the pipeline.
Its main purpose is to return the layout of our page.
The class Stage2 is constructed to display a single line of static text
(whatever text the user entered from Stage1). Notice we declare the attribute
text as a param.String as before.
Adding Stages to the Pipeline
Now that we have defined the classes Stage1 and Stage2, we can insert
instances of them into the Pipeline object pipeline instantiated above. To
do so, we make two successive calls to the add_stage method of pipeline. The
first call looks like this:
The input arguments name and stage are mandatory. We chose the string
identifier 'Stage 1' for name arbitrarily (but, of course, it makes sense to
have it match the class Stage1 passed into stage). We also make explicit
reference to the attribute ready from the class Stage1 in the
ready_parameter argument. When adding a stage, we can specify the
ready_parameter and set auto_advance to True; this makes the pipeline
proceed to the next stage whenever the ready_parameter is triggered (which for
this class happens when the callback method on_click_continue modifies the
value of the attribute ready).
The next stage is added similarly:
After adding stages, we define the sequence of the stages by calling the
define_graph method. The graph argument to this method is a dict whose
key-value pairs describe the adjacency relationships of successive stages in the
pipeline (referenced by the strings 'String 1' and 'String 2' in this case).
Finally, we wrap a Panel Column object around pipeline.stage to specify the
layout of the pipeline. We bind the resulting object to the identifier
example_app, and we also chain an invocation of the servable method to
enable running example_app as a dashboard on a webserver using panel serve.
View the New Pipeline
Let's view our app and confirm it does what we expect:
The first stage looks like this:
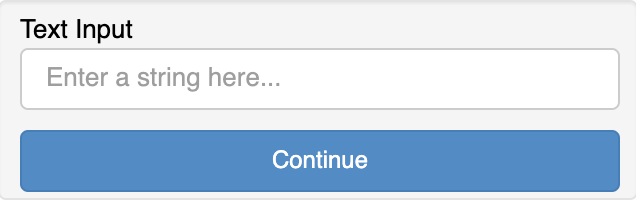
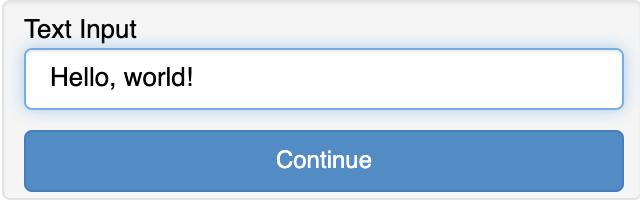
We can type in some sample text and click continue:
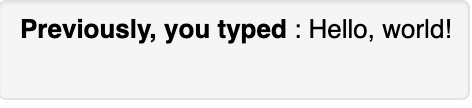
Our text will appear in stage 2:
This pipeline is about as simple as possible. The point here is to show how easy
it is to put these pieces in place. We provide an example below that includes
more complicated stages. We do everything just as above, but now, we insert
different classes in place of Stage1 and Stage2.
A Pipeline With More Complicated Stages
We have built a custom two-stage Panel app for pre-processing NLP (Natural
Language Processing) pipelines. Rather than showing the details of those two
classes as above, we have stored them in separate Python files as modules. All
we need to do is import those classes—PreProcessor and Trainer—and insert
them into our pipeline as above.
We construct the Pipeline object exactly as above. Instead of using strings
like 'Stage 1' and 'Stage 2' to label the stages, we use more meaningful
strings to describe the stages: 'Preprocess' and 'Training'.
And now we can view our new app:
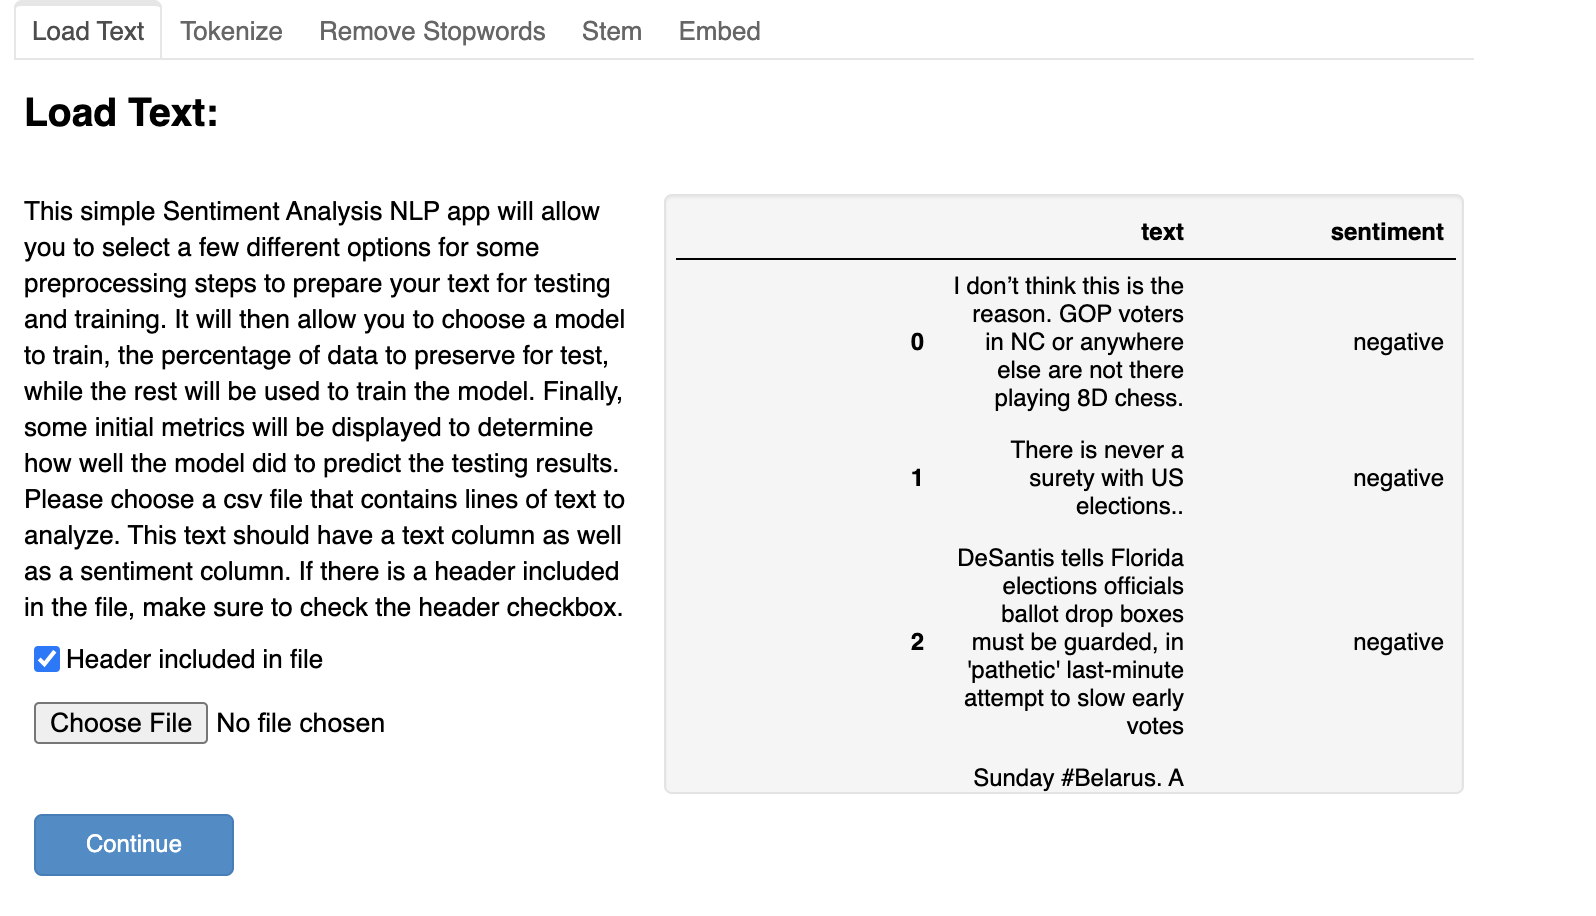
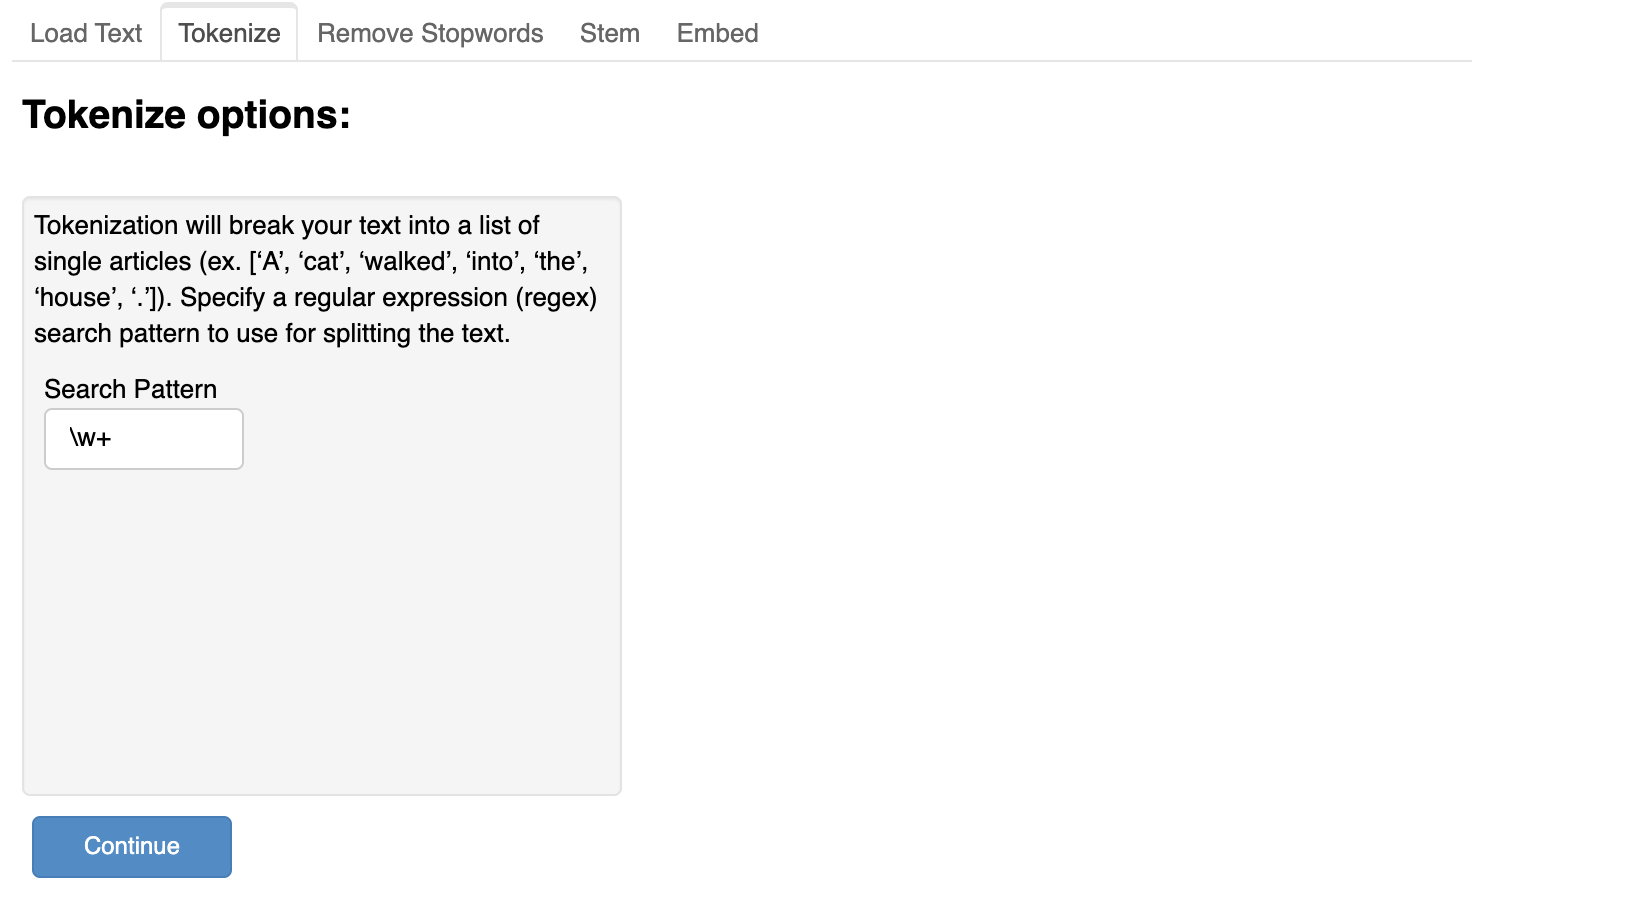
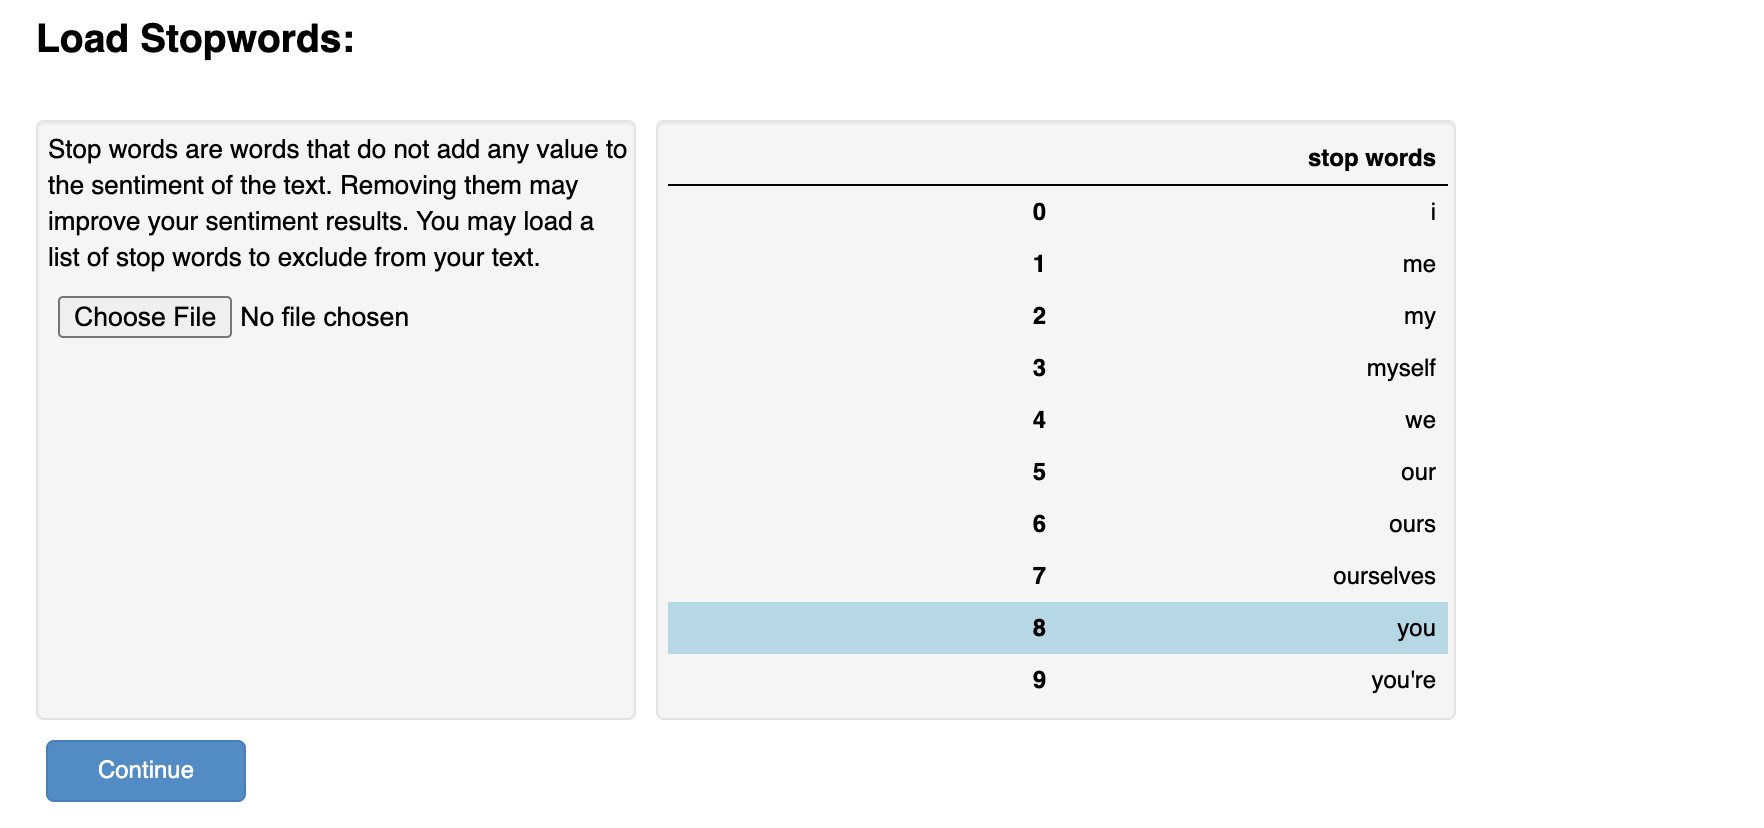
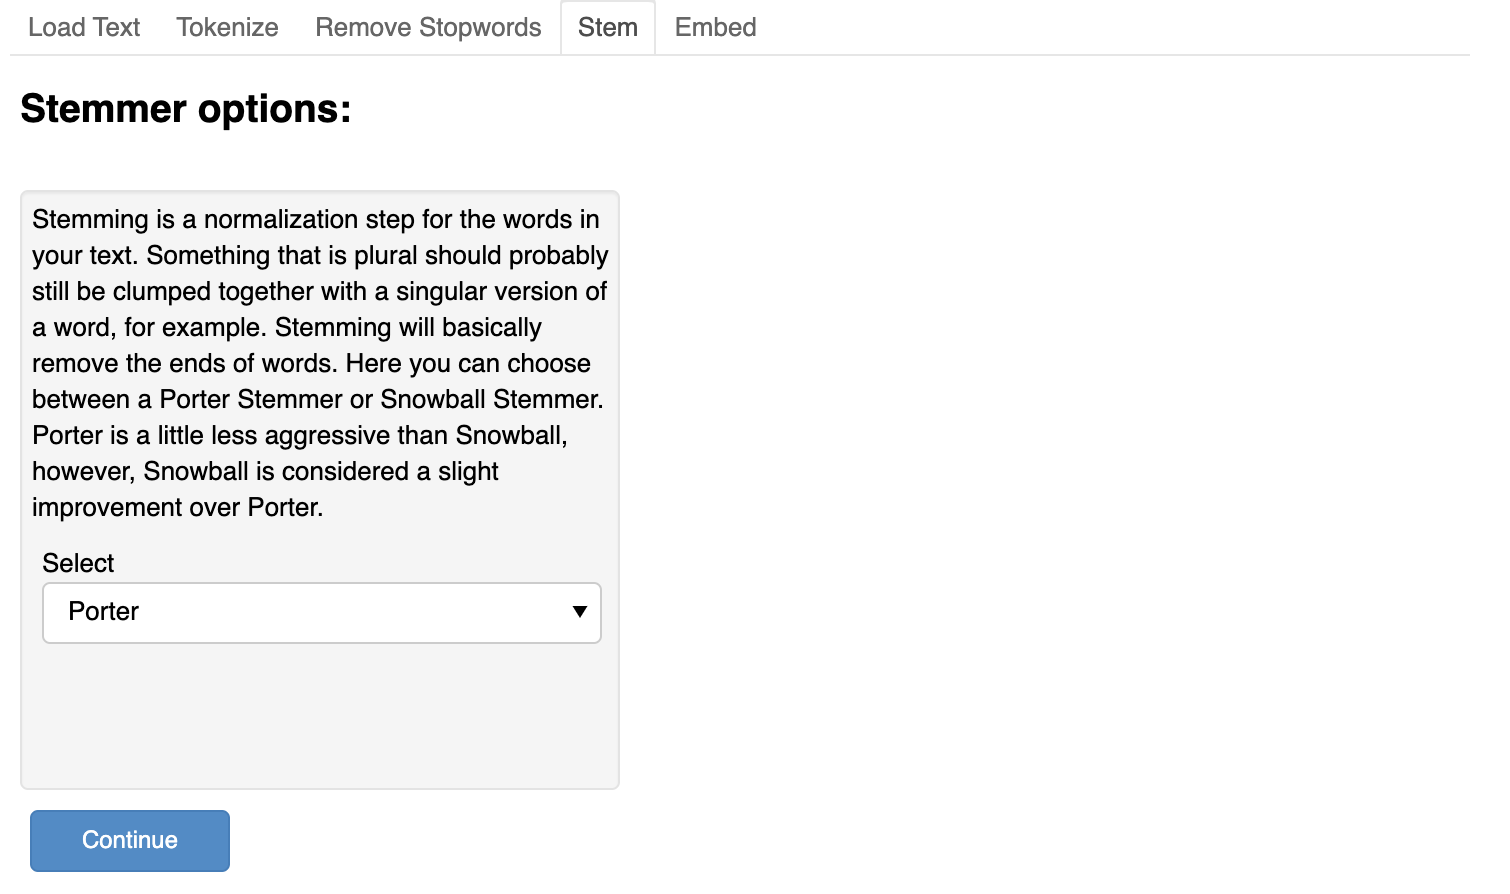
The first stage consists of a page that includes several tabs. Each can be seen here:

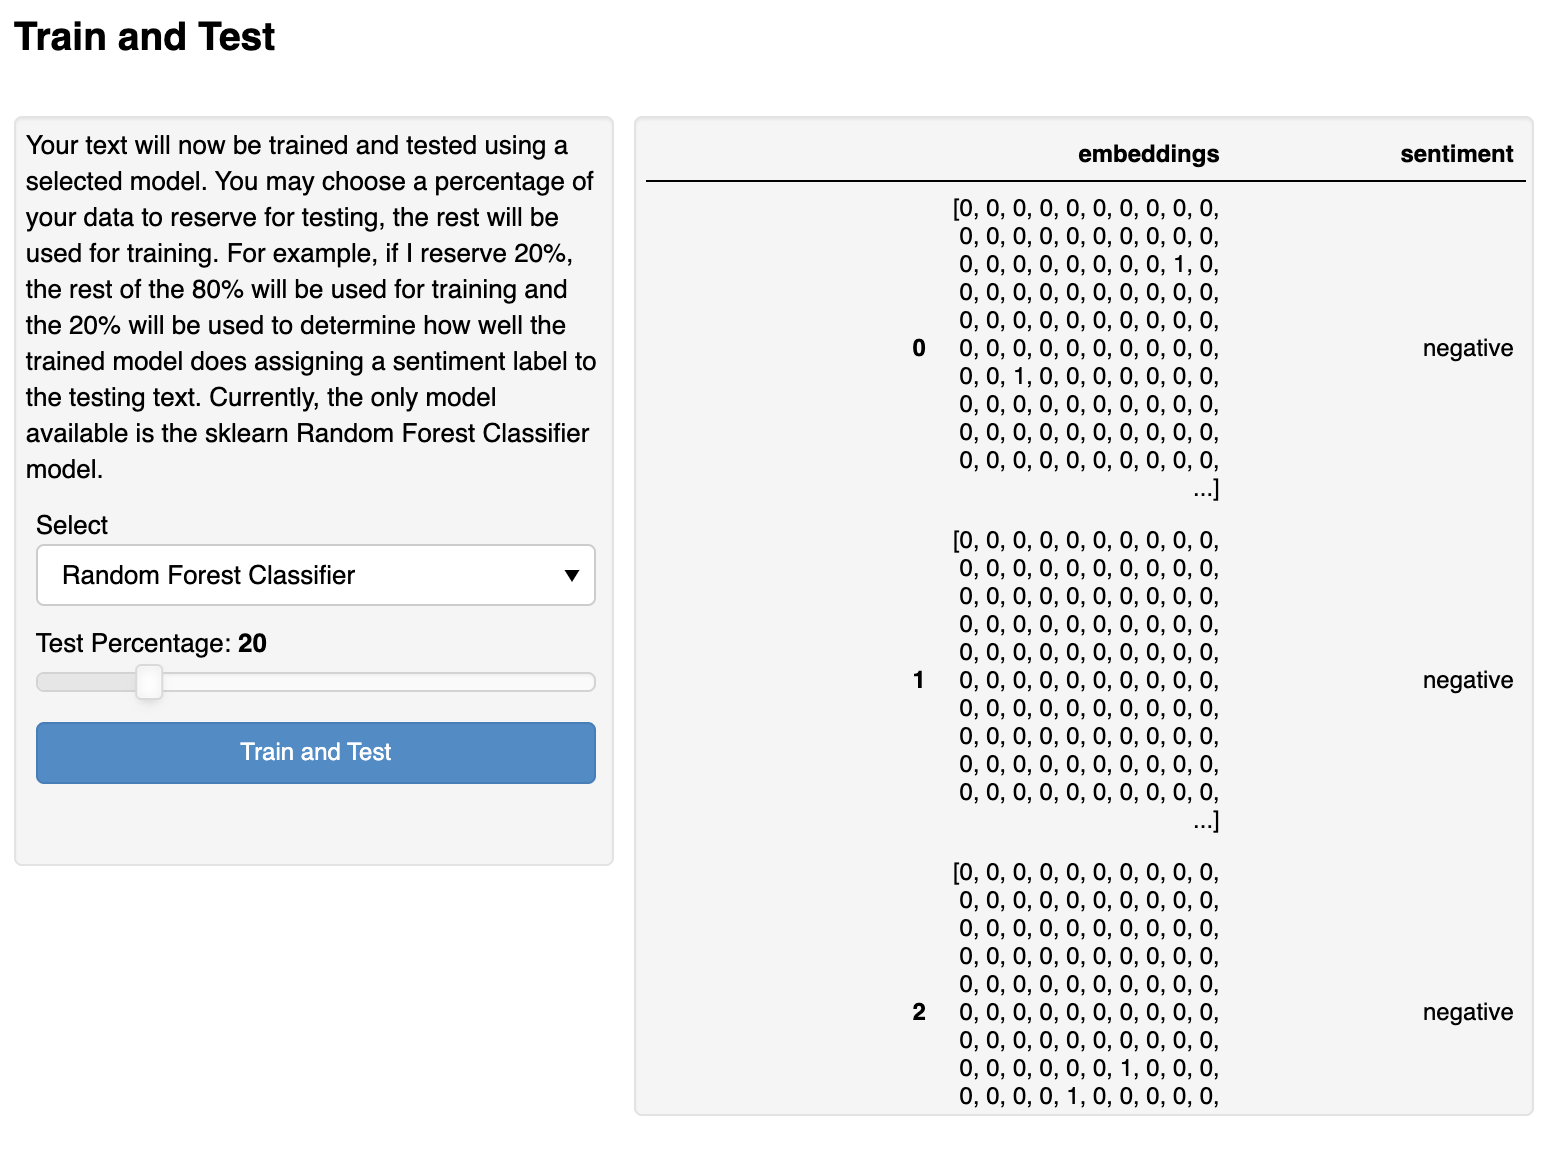
After we select all the options available to us on the app, we click continue to reveal the Train and Test page.
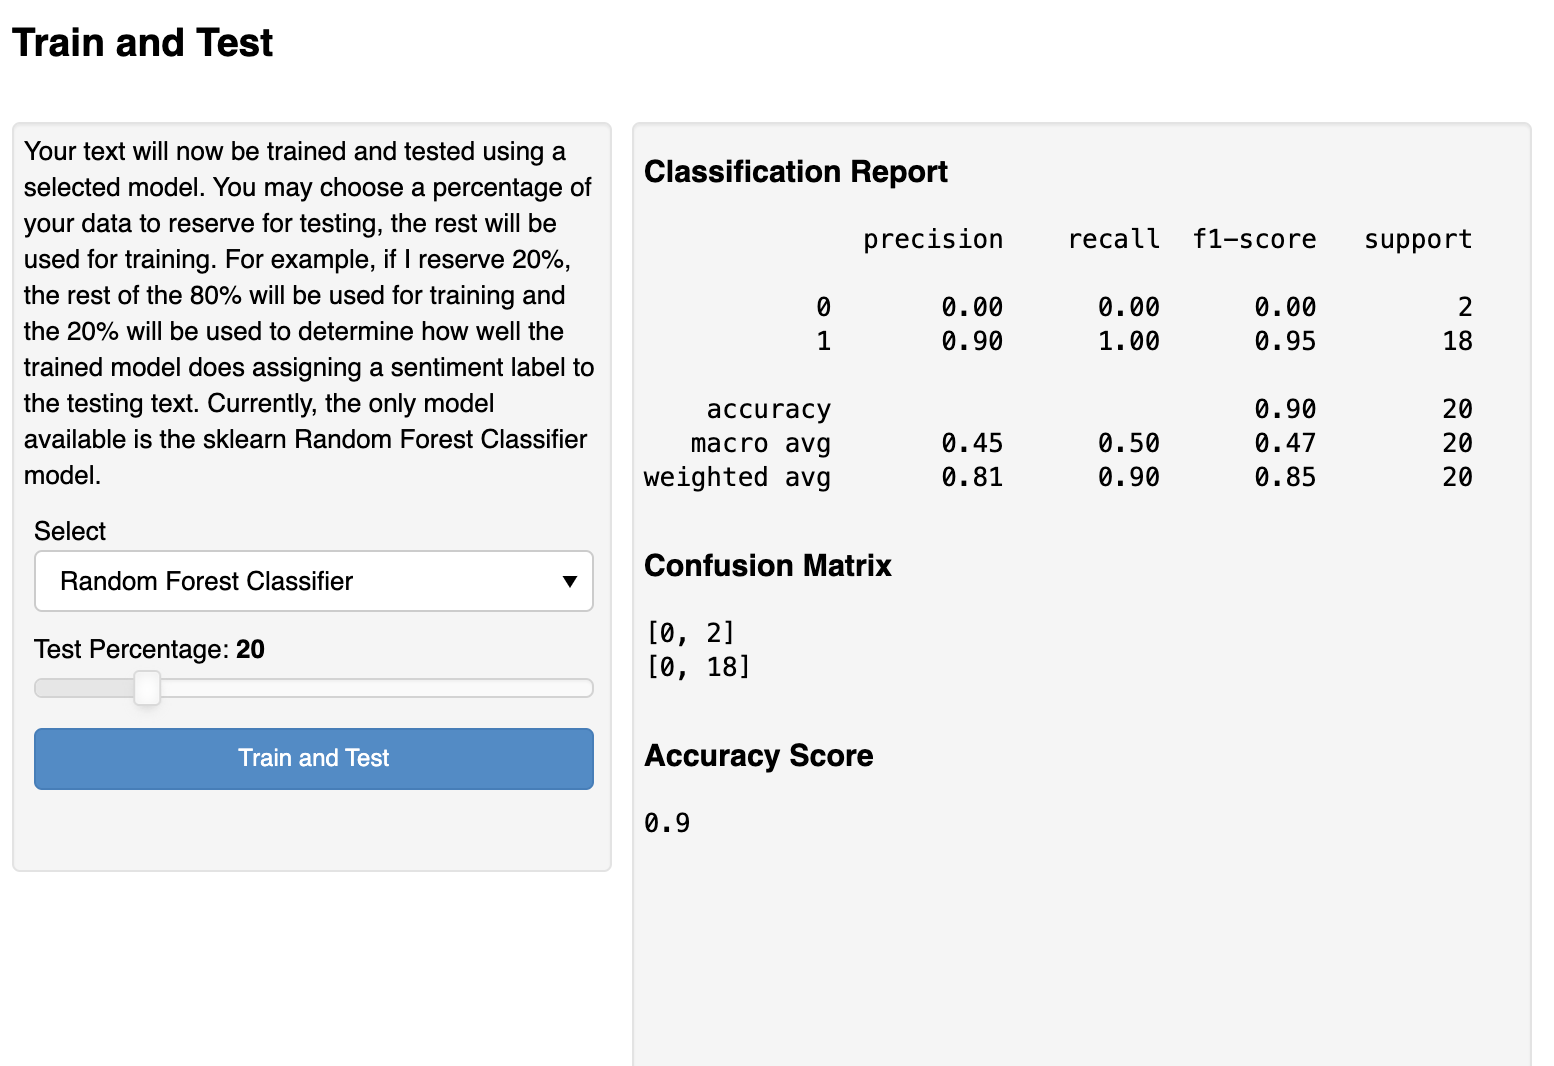
By clicking the Train and Test button, the model is processed. We can then see the results of the model in the pane on the right-hand side.
Final Thoughts
We hope this post on Panel Pipelines is enlightening. We can build more elaborate stages or pipelines with more than two stages. We can even have branching stages that depend on user input (e.g., clicking one button versus another button makes the pipeline proceed to different stages). It's quite flexible. We encourage you to try building a Panel pipeline app that can be useful in your work or daily life. Not only is it fun, but we think you'll find Panel makes it easy to put these stages into place!
For more information about getting started with Panel, check out the Panel documentation (and the section on Panel Pipelines). There is an active Panel community on Discourse as well.